Showing posts with label desserts. Show all posts

Monday, November 1, 2010

VANILLA PUMPKIN PIE


Halloween got cancelled.

On Wednesday we went down to London, to visit The Dungeons among other things. The sight of the 4-and-a-half hour queue stretching half-way around the block – a mighty big block it was, too – was plenty of horror for us so we decided to ditch that plan. Luckily we had other plans in London as well.

At the weekend I did 29 hours of work between Friday evening and Sunday afternoon. I was about to keel over out of exhaustion. I think I looked quite a bit like a zombie – I definitely felt like one. Actually quite fitting for Halloween, don't you think?

My sister-in-law had carved us a pumpkin lantern but I was too tired to put a candle in it and take it out. I was having a nap when we got trick-or-treaters but managed to get myself up, forgetting my glasses so I have no idea what they looked like.

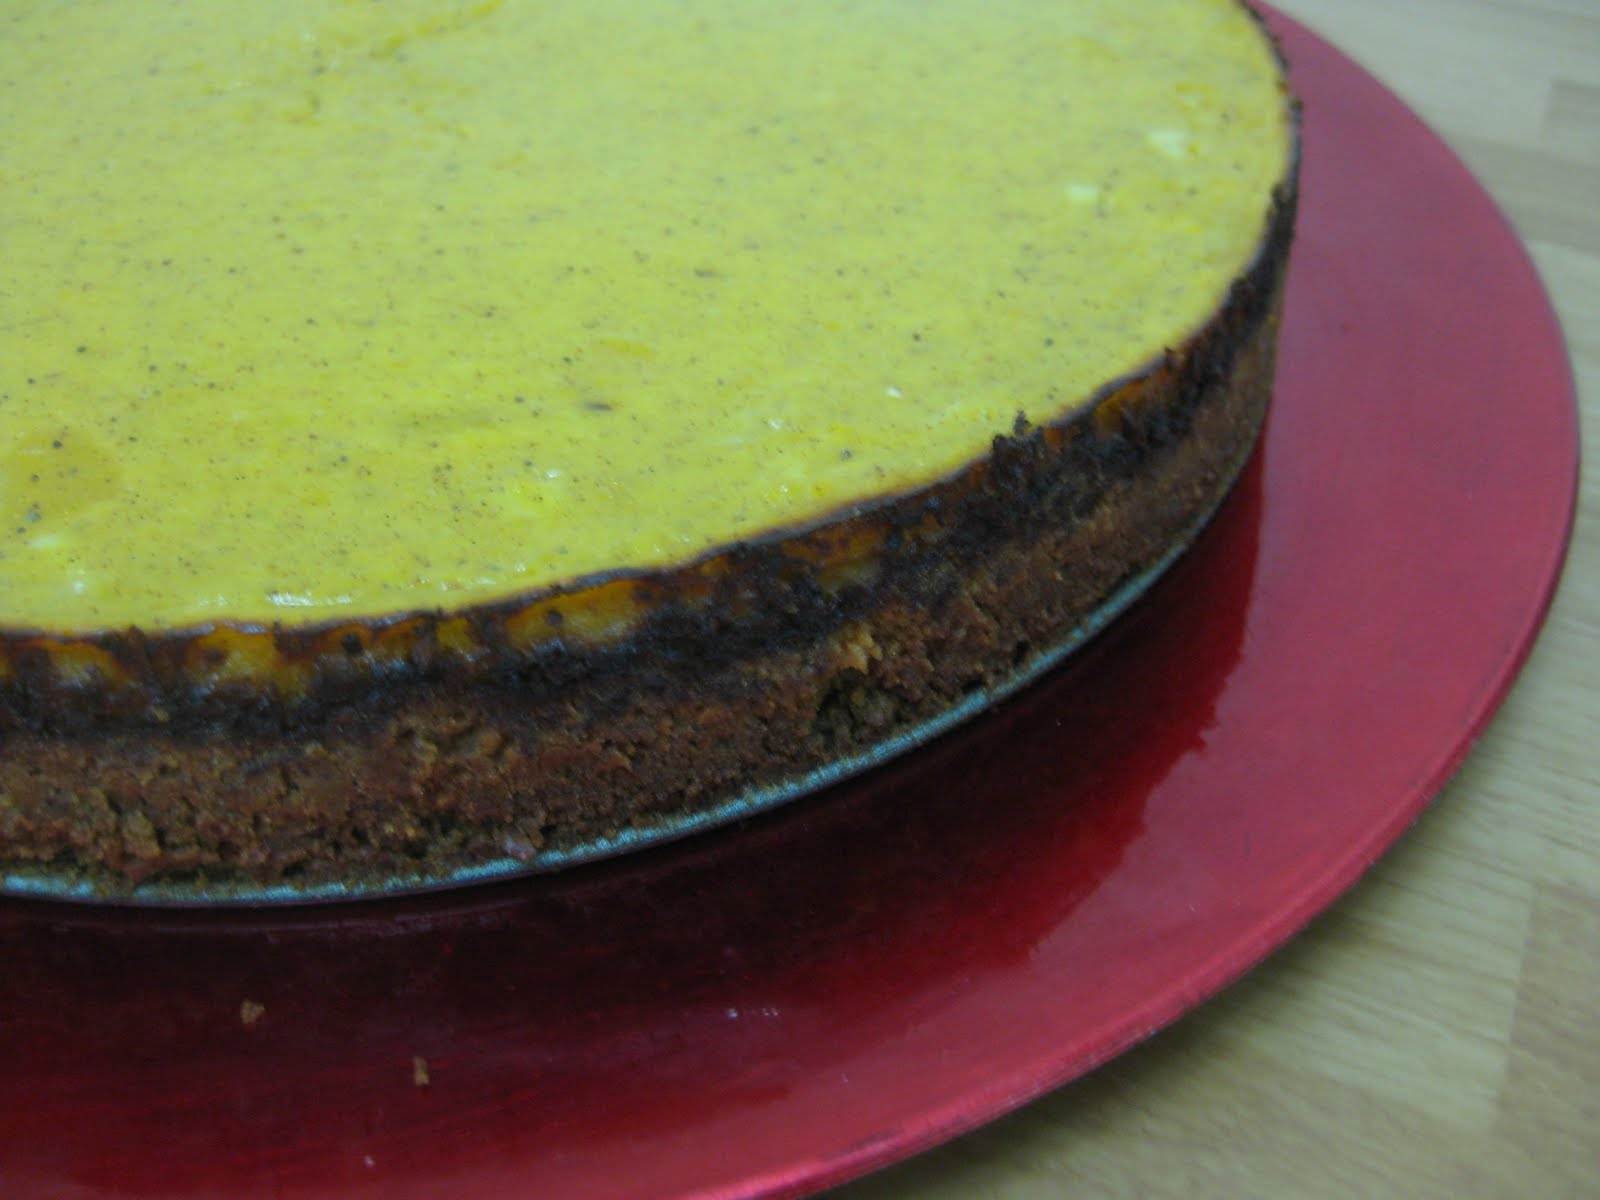
Oh well, at least I made a pumpkin pie earlier last week.


Crust:

100g unsalted butter
75ml sugar
150ml plain gluten-free flour mix


Filling:

5oog cooked pumpkin
40g custard powder
100g condensed milk
2 eggs
0.5ml ground cardamom
1ml nutmeg
4ml cinnamon
1.5 inch vanilla pod, seeds separated

Prepare the crust and roll out on a 10"/26cm pie dish. Chill before baking in 200°C until only just done. A disaster will happen if you use self-raising flour so keep away from it.

Puré the pumpkin and add remaining ingredients. Pour onto the crust and bake until set.

Serve with vanilla ice cream or some quality custard.


Before

After

Tuesday, September 21, 2010

DOUBLE-DECKER BROWNIE CHEESECAKE


Can't quite decide between two cheesecake flavours? I didn't want to choose so I made them both – and a brownie!

This recipe is not just ridiculously easy but also gluten-free and fairly low-carb. The cake is very rich and creamy but not too sweet.

I'm using the recipe to enter the We Should Cocoa chocolate challenge, hosted by Chele from Chocolate Teapot.

The brownie base is quite similar to my marinated mud cake.

Makes approximately an 18 cm cake.


Brownie base:

50g chocolate
100g cocoa powder
100g unsalted butter
30g sugar
2 large eggs


Raspberry layer:

400g cream cheese
sugar to taste
a handful of raspberries, I used frozen


Lemon layer:

400g cream cheese
sugar to taste
lemon juice
lemon zest


To make the brownie base melt chocolate and butter and mix in sugar. Allow to cool.

Beat in the eggs, one at a time. If the batter splits, it's too warm so put it in the freezer for a minute or two. Continue as normal and it will become smooth again.

Mix in cocoa.

Bake in 200°C until firm. Allow to cool.

Prepare the fillings. You will find it easier if you soften the cheese by pressing it through a sieve before you mix anything into it. Spread the fillings on the brownie base.

Chill overnight to set.

Friday, September 17, 2010

IMPOSSIBLE PIES


Film and food.

One of the owners of Looses Cookshop recommended the film Julie & Julia because I’m a food blogger myself. I know I’m very late and I don’t know why I hadn’t seen it yet. Well now I have and of course I loved it.

As most of you know the film is based on not just one but two true stories and works in two timelines. One is about Julia Child and the other about a contemporary food blogger Julie who is cooking her way through Julia’s book on French cuisine.

Even though I should probably relate to Julie more, I found Ms Child a lot like me: she’s very tall and loves butter. Oh, and there’s one more thing… the pearls. At one point Julie cries: ‘Pearls! The woman wears pearls in the kitchen.’

Honey, I wear pearls in bed. A lady needs her pearls.

Luckily for her, Julie starts to appreciate the beauty of pearls herself.

On to the food then...

The recipe is not French but it could easily be. I saw the original recipe here but it didn’t work so I had to adjust it quite a bit. Not much remains of the original but the ingredients.

The baking temperature was too low, there was too much flour, too much desiccated coconut and the instructions were a bit risky to say the least. You really want me to mix lemon juice with egg and milk? I did, actually, and luckily it did not split. The second time it did.

The original tag-line for the pies is ‘Impossible to resist’ but I think ‘Impossible to get right’ is more accurate.

Why are they called pies and not cakes? I don’t know.

The pies should have a firm, browned top and a sauce underneath. You just won’t get this if you use the amount of flour and coconut the original recipe quotes. I did try and below you can see the result.


The sauce should move into the hole but as there is too much flour and desiccated coconut, there is no sauce.


The second time I already reduced the amount of flour and coconut but it wasn’t enough. There was a lovely sauce at first but as the pies continued cooking at the table due to still being hot, the sauce firmed up.

The third time I used barely any flour and less sugar as well and converted all the measurements into volume for simplicity.

The pies were divine.


Impossible pies – made possible


6 tbsp sugar
1 tbsp gluten-free flour mix
7 tbsp desiccated coconut
0.5 tsp (2.5ml) gluten-free baking powder
zest of one lemon
5.5 tbsp coconut milk or milk
1 egg
1 tbsp melted butter, salted is fine
4 tbsp lemon juice


Mix together sugar, flour, desiccated coconut and baking powder.

In a separate bowl, mix together lemon zest, coconut milk, egg and melted butter.

Combine the mixtures and add lemon juice. Mix well.

Divide equally between two ramekins or small ovenproof dessert bowls.

Heat up the grill and brown the top of the pies. You can use a kitchen blowtorch if you don’t have a grill.

Bake in 200°C until the top is firm. The pies will be wobbly but will firm up slightly.

Serve when warm, not piping hot.

'Bon appétit!'


Tuesday, September 7, 2010

ORANGE AND DARK CHOCOLATE NANAIMO

Just when you thought it couldn't get any better. A classier take on Nanaimo bars.


Now that is sexy. Eat your heart out, Nigella.


Cut after a few minutes, when still a bit soft.


This is how nicely these cut at fridge temperature.


First layer:
As before

Second layer:
As before, with added orange oil.

Third layer:
75g dark chocolate
50 unsalted butter
10ml sunflower oil

Method for third layer: Melt butter and oil in a saucepan, add chocolate and mix until melted. Allow to cool down a little and spread on the cake. Set in the fridge. Cut and eat.


The original Nanaimo bars were wolfed down quite fast but after two batches I was feeling a bit adventurous. Certain recipes online use some additional ingredients in the custard cream layer to give it a new flavour and that got me thinking about the Polish orange oil in the depths of my cupboard. I also wanted to create a shinier, softer chocolate layer that wouldn't crack at fridge temperature.

Maybe the milk chocolate was to blame? Dark chocolate works better with orange anyway so I sent the hubby away to Tesco's to get some of that.

The first layer works as it is. I did use a bit of pistachios, though, when I ran out of pecans but only a little bit.

I also prepared the second layer as before, apart from adding some orange oil. You can also use an alcohol-based orange flavouring.

The smell of the custard cream was divine. I could hardly spread it on the biscuit base for feeling so dizzy at the aroma.

At this point I let the cake set in the fridge until the second layer was very hard to the touch.

Meanwhile I prepared the top layer using dark chocolate, also adding a little bit of oil to keep the chocolate soft at fridge temperature. The result was a beautifully glossy surface that was easy to cut into.

Should you, however, prefer to eat your bars at room temperature, remember that condensation will happen – at least if you live on this humid island. Some unfortunate bars ended up looking like they had blisters.

Friday, August 27, 2010

NANAIMO BARS

Criminally good stuff.


The defendant was doing her washing at the laundrette in question when a photograph in the complimentary magazine she was reading caught her attention. It was of a cake-stand filled with the most decadent treats, and a man standing next to it with the expression of a proud father on his face. One of the treats on the stand was a chocolaty bar-shaped object, temptingly glistening in the perfect lighting the photographer had arranged.

It emerged that the man was a former shoe designer starting a cheeky brasserie in London. The defendant was first tempted to perform the vile act she is accused of, when she noticed that the shoe man had kindly provided the magazine with a recipe for the bar.

The defendant thought long and hard. She had no pen or paper. Her mobile phone could perhaps be used to store the recipe until she got home, but writing it in the manner of text messages did not appeal to her.

She then looked around her and found that the only other customer at the laundrette was a darling of an old man, who was already packing up his newly washed clothes. When the man was gone, temptation proved too much and the defendant tore off the page. The defendant would like to plead guilty, Your Honour.


Evidence: The dedendant was in possession of the above objects.


NANAIMO BARS

Bottom layer:
100g unsalted butter
50g sugar
5 tbps cocoa powder
1 egg, beaten
200g digestive biscuits, or similar
75g desiccated coconut
100g finely chopped pecans

Pop the biscuits in a plastic bag and whack them with a rolling pin until fine. Melt the butter with the sugar and cocoa in a saucepan.


Mix in the dry ingredients and then the beaten egg. At this point I panicked at the amount of biscuit mix I had and decided to make two trays of bars. Next time I'll make just the one.


Line a 23x23cm baking tray with greaseproof paper or foil. Press the biscuit mixture in evenly and chill in the fridge.


Second layer:
2 tbsp custard powder
3 tbsp milk
50g butter
250g icing sugar

Mix together custard and milk, add butter and sugar. Be patient and beat until very light – lighter than what I've got here. Spread on the biscuit base and chill.


Top layer:
75g dark chocolate
50g butter

Melt the butter in a saucepan. Let the chocolate melt in the warm butter and mix well.


Allow to cool but not set. Spread over the second layer and chill.


When set, cut into bars or squares. The top layer will cut neatly when room-temperature, not fridge-cold.


This is a traditional recipe named after a town in Canada. The second and third layer are so sweet you definitely need a thick biscuit base for balance. I decided to make mine half as thin, as I mentioned earlier, and it ended up a little bit too thin in comparison.

The terrorised magazine was the Style supplement of The Sunday Times, the latest issue, I think. Name of recipe quoted by the article was Mrs Cox’s killer Nanaimo bars, and I don’t think killer was used purely to mean ‘awesome’. Carb alert! These will give you a nice sugar high if that’s what you’re into.

Mrs Cox’s son Patrick the Shoe Man will be opening Cox Cookies & Cake at 13 Brewer St., Soho, London on September the 1st.

Saturday, June 19, 2010

CARROT CAKE


Sam's Famous Carrot Cake, the best of it's kind. Great for a wedding cake, though the one above was for a less happy occasion. The light is a bit strange in the photo; the cake is white, not yellowish.

The original recipe has been adapted to yield a 28cm cake.


5 eggs
290ml milk
10ml lemon juice or vinegar
295ml sunflower oil
500g sugar
15ml vanilla extract -- 0r 16,25ml to be exact!
15ml cinnamon
2.5ml salt
415g flour
15ml bicarbonate of soda
365g grated carrots
125g desiccated coconut
195g chopped nuts
1 very small tin crushed pineapple with liquid (200ml)


In a large bowl, mix together eggs, grated carrots, coconut, nuts, pineapple, sugar, spices and liquids.


In a medium bowl, mix together remaining ingredients, which will be flour and bicarbonate of soda.


Combine by sifting the flour into the wet mix.

Bake in 175 for 1 hour and then in 150 for any remaining time.


FILLING:
Orange marmalade.

Cut the cake into three layers. Dampen all layers by brushing on orange juice or milk before spreading on a thick layer of marmalade. Make sure the top and the sides of the cake do not remain dry or crusty before applying the icing.


ICING:

200g unsalted butter
icing sugar to taste
800g cream cheese
15ml lemon juice


Beat together butter and sugar until white. Push the cream cheese through a sieve to soften it and add to the butter with the lemon juice. Mix together well. Add more sugar if necessary.

If you want an even finish, it may be easier to achieve it if you pop the icing in the fridge for a while to harden it a bit.


Cake recipe from http://allrecipes.com/Recipe/Sams-Famous-Carrot-Cake/Detail.aspx

Friday, June 18, 2010

DOG-SHAPED CHOCOLATE CAKE


This was for my sister-in-law's birthday. The cake itself is a Black Forest cake, or Black Forest gateau, as Delia Smith likes to call it. As gateau is just a French word for a layer cake, I'll call this a cake. The recipe is from Delia's book Delia's Complete Cookery Course. Anyway, Black Forest, or Schwarzwald is in Germany. Why the French then?

Black Forest cake is a very traditional cherry cake, and something I wanted to try but you can use any recipe you like because this post is just about creating the dog-shape.


Delia's Black Forest gateau:

6 large eggs
150 caster sugar (Non-British readers: that just a type of sugar that's slightly finer than usual)
50g cocoa powder

Filling and topping:
300ml double cream (I'd say you need 400ml)
sugar
450g tin or jar Morello cherries
(I also used raspberry jam for the semi-circle)
1-2 tblsp Kirsch or rum
(50g plain chocolate to decorate - didn't use any because I wanted the dog to remain perfectly white.)

Use a 20cm deep cake tin. Separate the egg whites from the yolks, do not discard anything. Whisk the yolks with the sugar until they just begin to pale and thicken, which will not take long. Fold in the sifted cocoa powder. Beat the egg whites on their own until white. Stir a little bit of the egg white into the chocolate mix to loosen it up and fold in the rest of the egg white. Bake in 180°C until done but not dry.

The cake should be very moist so I used the liquid from the cherries to dampen the cake when I filled it.

What I used to paint the mouth, eye and ear is a mixture of honey and cocoa powder.


When the cake has cooled down, cut it as demonstrated below.


Thinnen the head and legs of the dog. Leave the semi-circle thick. Adjust any bits if they look wonky.


Cut the cake into layers and fill it.


Then it's time for the cream. I forgot to save some to make a tail.


Paint on the eyes, etc, just before serving if you're using honey-cocoa mixture because it will bleed a little.

Monday, June 14, 2010

ROYAL ICE CREAM COMFORTER


Today was the second Monday I wanted to go dancing in the effort of starting a new hobby. Last week I had a bad day so I stayed home and ate, and ate a bit more. Today I took so long finishing my dinner (eating again?!) that I would've been very late so I decided to give it a miss again. I wish I had some ice cream and lemon curd now to cheer me up.

Next time I will be there, and I will be on time. I'll have to go now that I've written it here.

Here's an older photo and my recipe for a treat good enough for the Queen. I bet she eats her ice cream with lemon curd like I do. I bet she loves it.


A few scoops of vanilla ice cream
Maybe four spoonfuls (tbsp) lemon curd
Fudge shavings or pieces (from 1 bigger piece of pick-and-mix fudge)
Vine fruit: raisins, sultanas, currants, whatever you like.

Tuesday, September 29, 2009

DARK CHOCOLATE CAKE

This is the best chocolate layer cake recipe I've found so far. Here's a picture of a graduation cake I made for my other half. He's a software engineer and a Mac man as you can see.


This is for a 28cm (11 inch) cake tin. Bake the cake one or two days before serving.

335g flour
535g sugar
85g cocoa powder
2.75tsp bicarbonate of soda
1.25tsp baking powder
0.75tsp salt
3 small eggs
200ml cold coffee
430ml milk
2.75tsp vinegar or lemon juice
160ml mild vegetable oil

For the filling:
200ml milk
250ml double cream of whipping cream
Sugar to taste
500g strawberries

For the icing:
200g dark chocolate
2ooml double cream or whipping cream


Measure all the wet ingredients into a large bowl and mix together. The bowl should be big enough to hold all of the batter so it needs to be a lot bigger than in the picture. (Oops!)


Combine the dry ingredients in a medium bowl add to the liquid though a sieve. Stir gently so no lumps will appear.


Pour into a prepared cake tin and bake in 175°C until a toothpick comes out dry. Wrap well and leave the cake in the fridge until the next day.

Whip the cream and slice the strawberries. Cut the cake, dampen the layers with the milk and fill it with the strawberries and cream.


To make the icing:
Melt the dark chocolate gently and stir in the cream. Allow to cool and whip up. Spread on the cake.

I had another problem here when the chocolate I used refused to cooperate so I had to make some adjustments. That's why the chocolate icing looks a bit runny in the picture. It's my second disappointment with Rainbow dark chocolate (sold in Finland) so I'm never using it for baking again.


If you want to make the chocolate Apple logos, use a MacBook and a bit of cling film. Melt the chocolate, put it in a small piping bag and just squeeze onto the logo. The edges are elevated so the chocolate will set nicely. Move the cling film to make another one. You can put the apples upside down on the cake to make them look perfectly smooth.


This recipe is a version of one found here: http://allrecipes.com/Recipe/Dark-Chocolate-Cake-II/Detail.aspx

Monday, September 21, 2009

TIGER CAKE

This is cake substitutes some of the flour with potato starch for a dense but soft result. It simply melts in your mouth. Delicious with a cup of tea.

An Englishman might call this a marble cake but I think the Finnish tiger cake has a stronger pattern, proper stripes instead of a touch of colour. Someone will disagree, I'm sure.


200g unsalted butter
3 eggs
150ml sugar
200ml potato starch
100ml all purpose flour
1 tsp baking powder
50ml (or more) cocoa powder
vanilla or vanilla flavouring


Beat the butter and sugar until white and fluffy.


Mix in the eggs.


In a separate bowl, mix together the dry ingredients excluding the cocoa powder. Add to the butter mixture with the vanilla and stir well.


Separate one third of the batter and mix in enough cocoa powder to give a chocolatey colour.


Prepare a ring-shaped cake tin or a loaf tin and spoon in half of the light batter.


Top it with all of the brown batter. Spoon in the rest of the light batter.


After this you can stick a knife in the cake and gently 'cut' a full circle around the whole cake. This will mix the two colours together just enough to make a nicer pattern.

Bake in 175°C for about 50 minutes. Don't forget to decrease the temperature to 150°C if you're using a fan-assisted oven or the surface of the cake will swell and rip like it did when I made this cake...


Monday, June 8, 2009

MARINATED MUD CAKE


This is a very firm mud cake that is then marinated to create a more traditional, soft and moist cake with extra flavour.


100g dark chocolate
100g cocoa powder
200g unsalted butter
50ml fructose or 75ml regular sugar
5 eggs
50ml ground almonds, maybe a little less if you like

Marinade:
Irish cream, rum, Cointreau, etc.


Grease the edges of a small cake tin (about 18cm or 7 inches) and sprinkle with ground almonds. Place a greased piece of greaseproof paper on the bottom of the tin.


Melt the chocolate and butter and mix in the fructose and cocoa powder. You may want to use more sugar than I did if you like sweet. Let the mixture cool down a little. Add the eggs one at a time, beating until thoroughly mixed every time.


The batter may turn grainy like in the picture below but don't worry; it just means it's a little too warm. Pop it in the freezer for a couple of minutes and then continue as before by beating in another egg.


The batter will then turn smooth. Keep adding eggs.


Mix in the ground almonds and pour the batter in the cake tin.


Bake in 200°C for 10-15min.


When the cake is closer to room temperature, pour plenty of marinade on it and spread all over. It's better to do this while the cake is still in the tin because it gives an evenly moist result.


Repeat two or three times. Let the cake absorb as much liquid as it can. It will turn very dark and shiny.


Serve the next day.